Installation
11/11/2020 - 5 years agoBefore begin installing the application make sure your server have these requirements
https://support.pandisoft.com/articles/2/server-requirements
NOTE : The application must be installed on a subdomain or on the root of the domain
- Create sub domain
- Upload Ticky Files to your server
- Create database
- Complete installation
Create sub domain
Locate the ‘Subdomains’ icon in your control panel and click on it to fire up the application.

Select the domain you want to add a subdomain to, enter your subdomain and click ‘Create’. Once you’ve completed this step, you have successfully created a new subdomain!

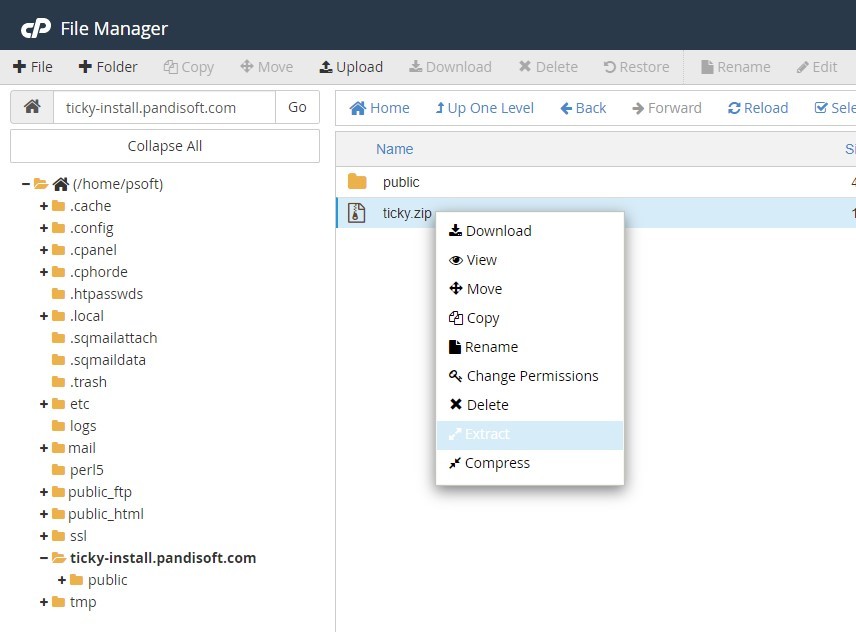
Upload Ticky Files to your server
- Login to cPanel.
- In the FILES section, click File Manager.
- In the upper right-hand corner, click on Settings.
- Select Web Root, Show Hidden Files, and then click Go. ( it may automatically redirect your to file manager)
- Open your subdomain folder ( if you choose to install the application on subdomain)
- Click Upload from the top toolbar.
- Click Browse (some web browsers will have Choose File instead).
- Select the ticky.zip file on your computer ( You find ticky.zip on package you downloaded from your Envato account )
- Once the file has been selected, it will automatically upload.

Extract the ticky.zip file you uploaded.
Create MySQL database
- Log into cPanel and locate Databases.
- Click MySQL Databases.

- In the New Database field, type a name for the database.
- Click Create Database.

- Click Go Back.

- The new database will appear in the Current Databases table.
Create a Database User
After creating the database, you will need to create a user and assign privileges
- Log into cPanel and locate Databases.
- Click MySQL Databases.
- Click Jump to MySQL Users in the top-left corner of the page.
- Under Add New User, enter a username.
- Enter a password in the Password field.
- For help generating a strong password, click the Generate Password button.
- Retype the password in the Password (Again) field.
- Click Create User.

Assign Privileges to Database User
- Log into cPanel and locate Databases.
- Click MySQL Databases.
- Under Add User to Database, select a user from the User drop-down menu.
- From the Database drop-down menu, select the database you wish to allow the user access to.
- Click Add.
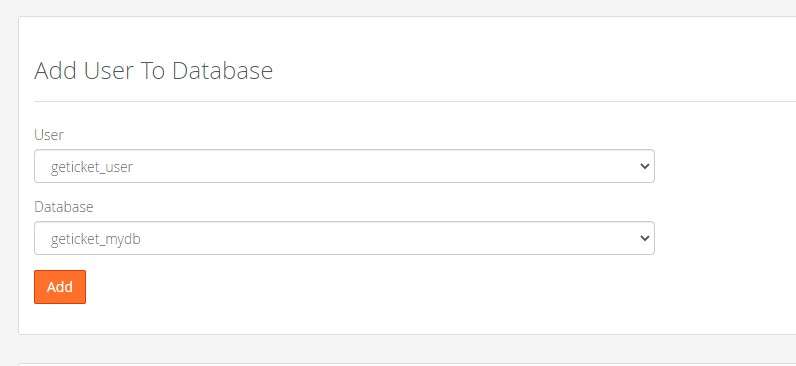
- From the MySQL Account Maintenance screen, select the privileges you wish to grant the user or select ALL PRIVILEGES.
- Click Make Changes.

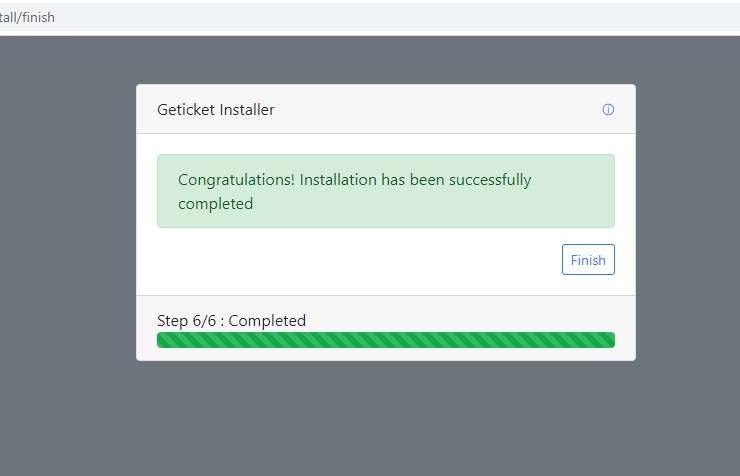
Complete installation
Open your subdomain on your browse and follow the install wizard to completed your installation
Note : If you get folder permissions Error please refer to this article on how to fix your folder permissions https://support.pandisoft.com/articles/15

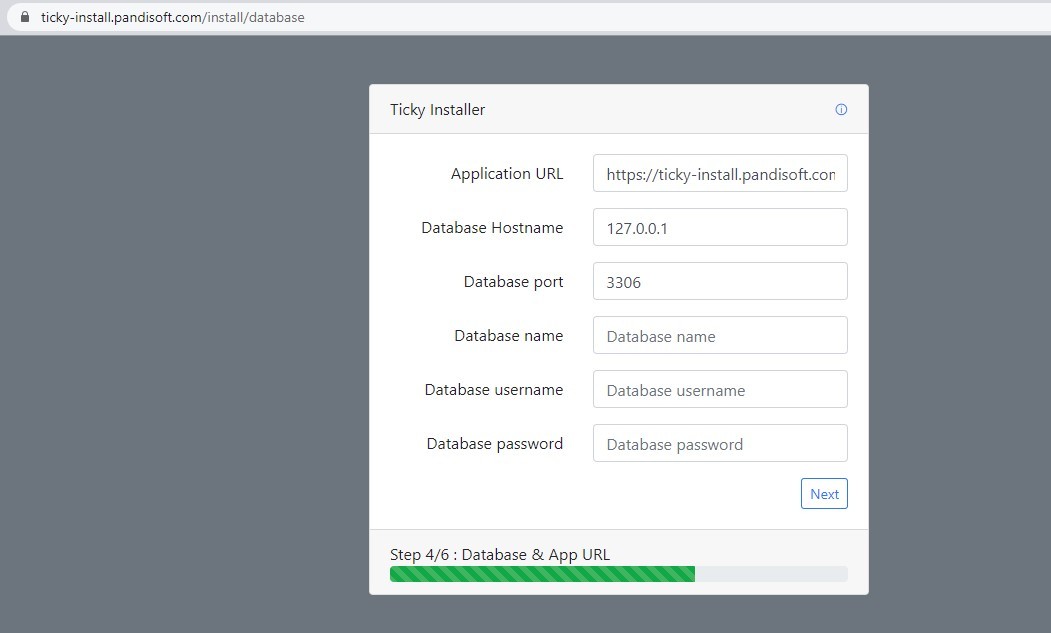
The installation wizard will verify application requirements and folder permissions, Then you will need to enter your purchase code, How to find your purchase code
Enter your database details and click next button
Create the admin account and click next button

That's all you application is ready